
:
Underside Caravan Stone Protection
We caught up with Andrew Phillips and the team from The RV Repair Centre to give us the rundown on protecting your van.
A stone or rock flicked up by your tow vehicle can wreak havoc with exposed electrical and plumbing lines or fittings on the underside of your van. A stone smashing components under your van is a nuisance at a minimum but also potentially very dangerous. A stone can break wiring leading to your electric brakes, rendering them inoperable. Trying to stop a rig without the caravan brakes is putting your life and the lives of other road users at risk due to increased stopping distances. It will also put additional load on your tow vehicle brakes which could cause them to ultimately fail. In remote locations loss of drinking water from a broken plumbing fitting could also be perilous.
Off road oriented vans are more likely to be equipped with stone protection from the factory but many touring vans are quite vulnerable. Even if you mainly travel on sealed roads you could still be unlucky enough to stir up some stray debris off the road that could kick up and cause damage.
Fortunately adding stone protection to your van is relatively inexpensive and simple to do with basic tools if you have the mobility to crawl under the van. A garage creeper may make the task easier if you can get access to one – you know, those flat trolley-like devices that mechanics use to slide around under cars.
We cheated a little bit because the van pictured already had a fair bit of stone protection on it, some factory fitted and some fitted by the owner. In some instances in this article, we just took the protection off and took photos of refitting it!
Safety First
Ensure the van cannot roll or fall on you while you are under it by always using the following precautions:
Park the van on level ground with the tow vehicle detached
Engage the park brake and ensure it is functioning correctly
Chock the van wheels
Place axle stands under the A-frame as a back up to the jockey wheel
Lower all of your stabilisers
It is also a good idea to have someone else around to get help if something did happen to go wrong. Even if nothing goes wrong it is handy to have someone who can pass you things while you are lying under the van.
Often the van will be dirty underneath, safety glasses will make the job much more pleasant and safe when you dislodge dirt. If you plan ahead, you can wash the underside of your van and allow time for it to dry. You are going to need to do a fair bit of cutting. Using something like some wide opening snips will be safer than working with an open blade.
Planning
Have a good look under your van and identify wires, plumbing or fittings that appear to be exposed.
In the case of wiring, it could be routed to your brakes, stability control or your lights among others. Flexible conduit is the go-to method for protecting wires. It is corrugated so that it has some impact resistance and can bend easily to wherever you need it to go. It is also slitted so that you can easily feed the electrical wire into it.
Flexible conduit is available in various diameters. Select a diameter (you may need more than one) that will enable the wiring to be encapsulated snugly without having to stuff it in. To roughly measure the total length, you need just follow the lines with a tape measure and add all the sections up.
The plumbing could be rigid PVC pipe or flexible polyethylene pipe. Identify the diameter of the pipes and the lengths you will need. To protect plumbing you could use flexible conduit or a foam sleeve - either plumbing lagging or pool noodles. Plumbing lagging is convenient as it comes pre-slit and is usually a subtle dark colour. Pool noodles seem to be universally brightly coloured and may or may not have the pre-slit.
Some vulnerable points such as taps and protruding plumbing fittings can’t be covered with a protective sleeve. An aluminium guard or rubber flap can be a good solution.
Fitting Flexible Plastic Conduit
Wiring and plumbing are usually clipped to the chassis with clamps or cable ties to keep things tidy. It may be necessary to temporarily unclip the wiring or plumbing line to enable it to be fed into the flexible conduit. It may also be necessary to replace original clamps with larger clamps to accommodate the increased diameter conduit.
The flexible conduit should be fitted in the most continuous lengths possible for maximum protection. If you are working with a long line just roll out the conduit and feed the wire into the slit as you go. Then cut off the conduit when you reach a juncture being careful not to cut the wiring or plumbing or yourself! For short lines it is possible to measure out each length simply by holding the conduit up to the section you want to cover, mark with a white pen and cut with snips or electrical side cutters.
Fitting Foam Sleeve
Usually you will be able to measure by holding up your protective sleeve up to the pipe, make a mark and cut. Cutting notches in the foam will enable you to accommodate plumbing fittings. Simply slide the protective sleeve over the plumbing lines and secure with cable ties.
Aluminum Guard
Creating an aluminum guard can be as simple as putting a couple of folds in a sheet of metal and attaching to the A-frame or chassis. First you will need to identify if there is a potential mounting point. In this instance, the manufacturer had opted to drill holes in the A-frame to mount the guard.
To replicate this guard, measure up some dimensions and make a template out of cardboard complete with folds. Hold the folded cardboard in position to ensure it will fit and provide adequate protection. Flatten the cardboard out and use this as a template to cut out your aluminium sheet. A nominal thickness of 2mm should provide adequate protection and be practical to cut and fold. A good pair of snips could be used to do the cutting. Any sharp edges can be deburred with a file. The folding can be done by clamping up against a block of wood and bending by hand. This guard was originally mounted with pop rivets so that’s what we used to put it back.
Rubber Flap
Other vulnerable points such as a plumbing fitting, a side step or stabilisers can be protected with a rubber flap. This can be a simple solution as there may be no fabrication required. It is a matter of finding a method to attach the flap. In this instance we relocated a plumbing fitting to behind a chassis member so it could be used as a mounting point for the rubber flap. The flap can then simply be screwed on.
Caution – Drilling Holes and Adding Fasteners to Your Caravan
A good deal of discretion is required when drilling holes and adding fasteners to your caravan. There could be wires or plumbing hiding behind where you plan to drill. Proceed with caution and do not drill any deeper than you need to. Also think about whether the fastener could penetrate wires or plumbing.
A large enough hole or too many holes could compromise the integrity of your chassis or A-frame – sorry we can’t tell you where to draw the line on this. Drilling holes breaks the protective surface on metal possibly leading to corrosion. Any holes created should be “painted” with suitable corrosion protection.
You need to be careful selecting fasteners that are made of a suitable metal. Using an incompatible fastener material (dissimilar metal) can promote corrosion. There is a whole science to this beyond the scope of this article.
If In Doubt Consult a Professional
Improper maintenance could lead to injury, death or property damage. Maintenance work of this nature should only be undertaken by persons with suitable mechanical competence. Information provided is general in nature and can only be taken as a guide. Individual discretion must be exercised and persons undertaking described tasks do so completely at their own risk. Publishers and creators of this content accept no responsibility for loss or damage.
Thanks to Andrew Phillips and the team from the RV Repair Centre, 120 Canterbury Rd
Bayswater Nth Vic 3151, Ph: (03) 9761 4189
Flexible Conduit Protecting a Plumbing Line
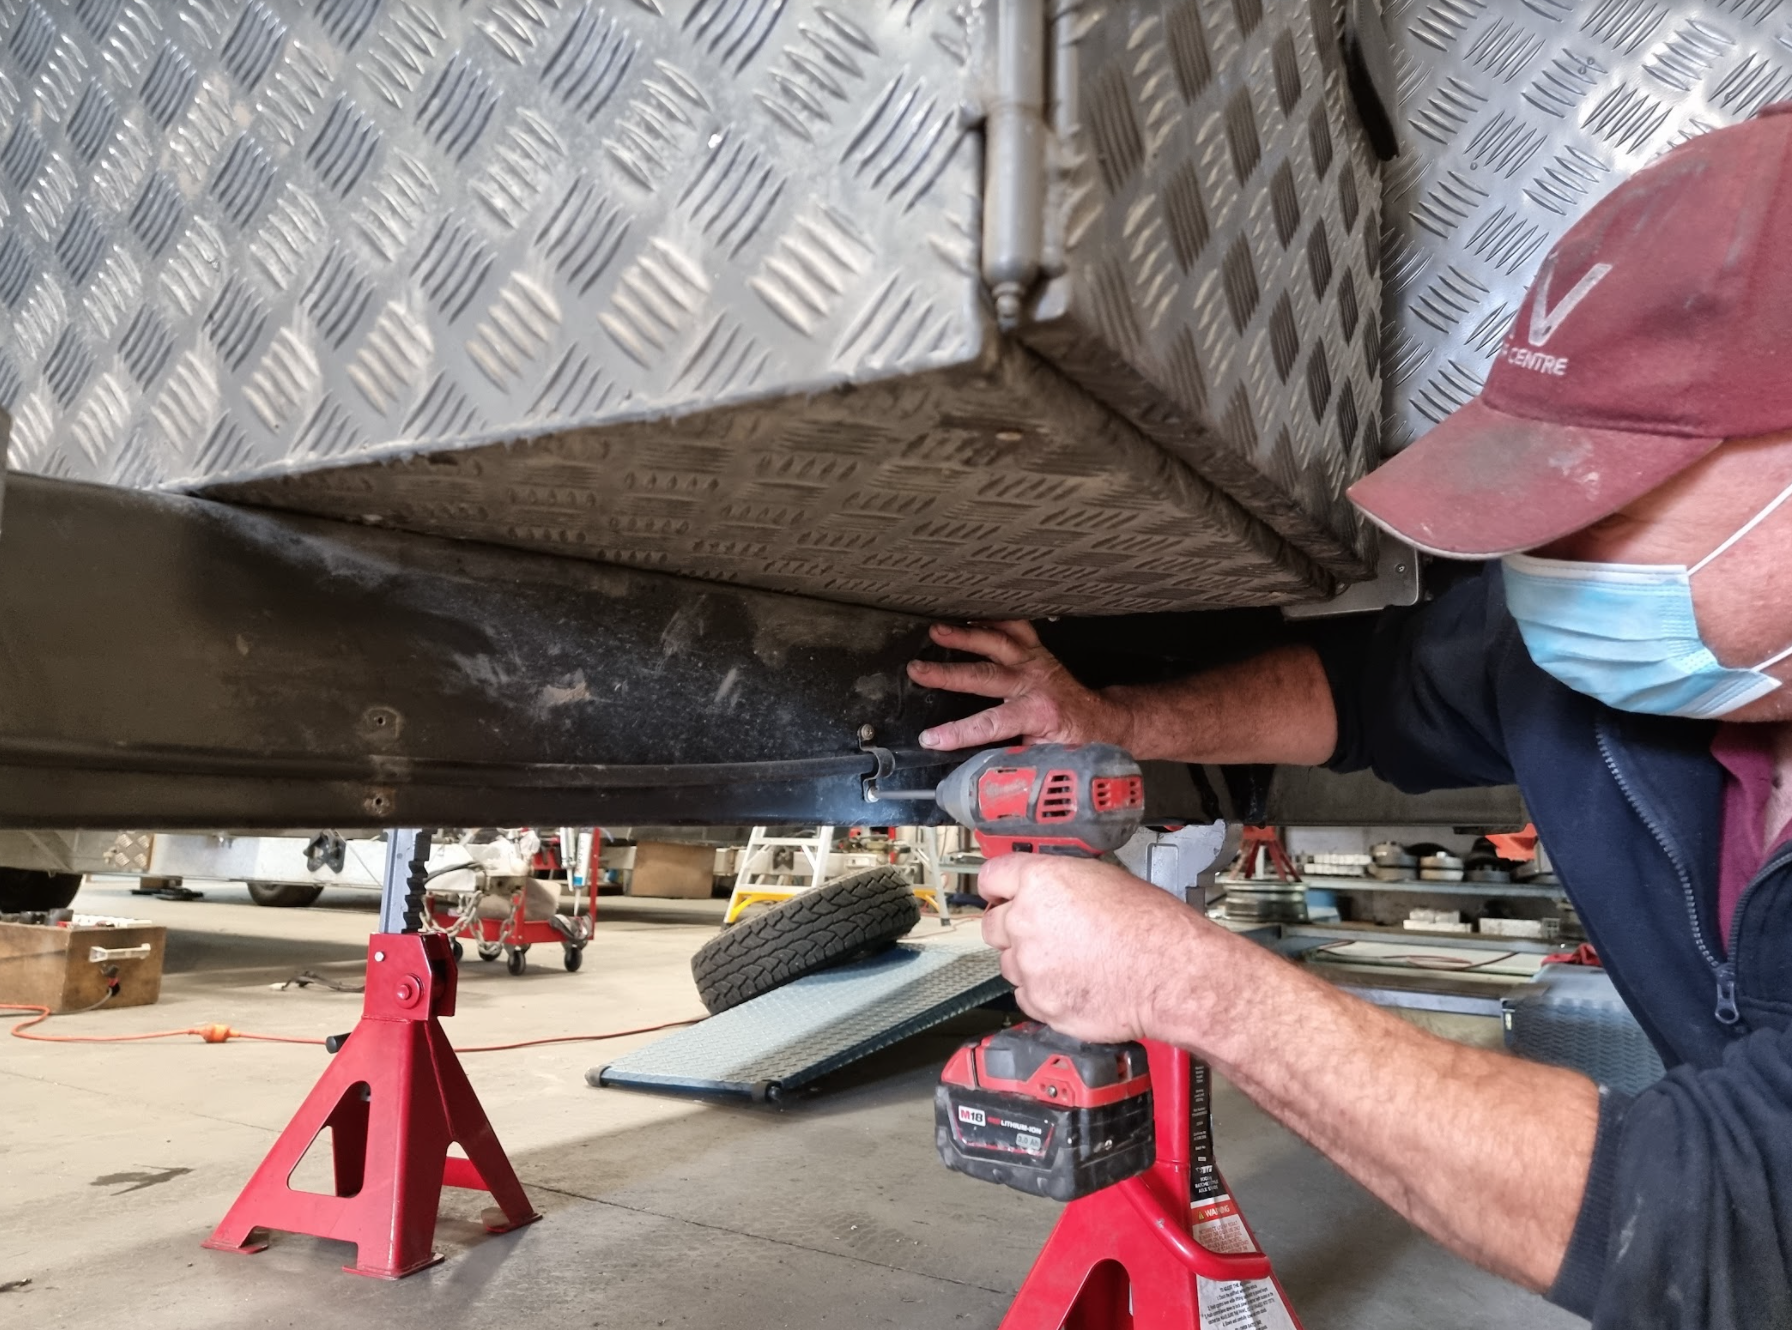 1. Remove the clamps holding the plumbing in place 1. Remove the clamps holding the plumbing in place |
 2. For short lengths you can use your hands to measure out the conduit required 2. For short lengths you can use your hands to measure out the conduit required |
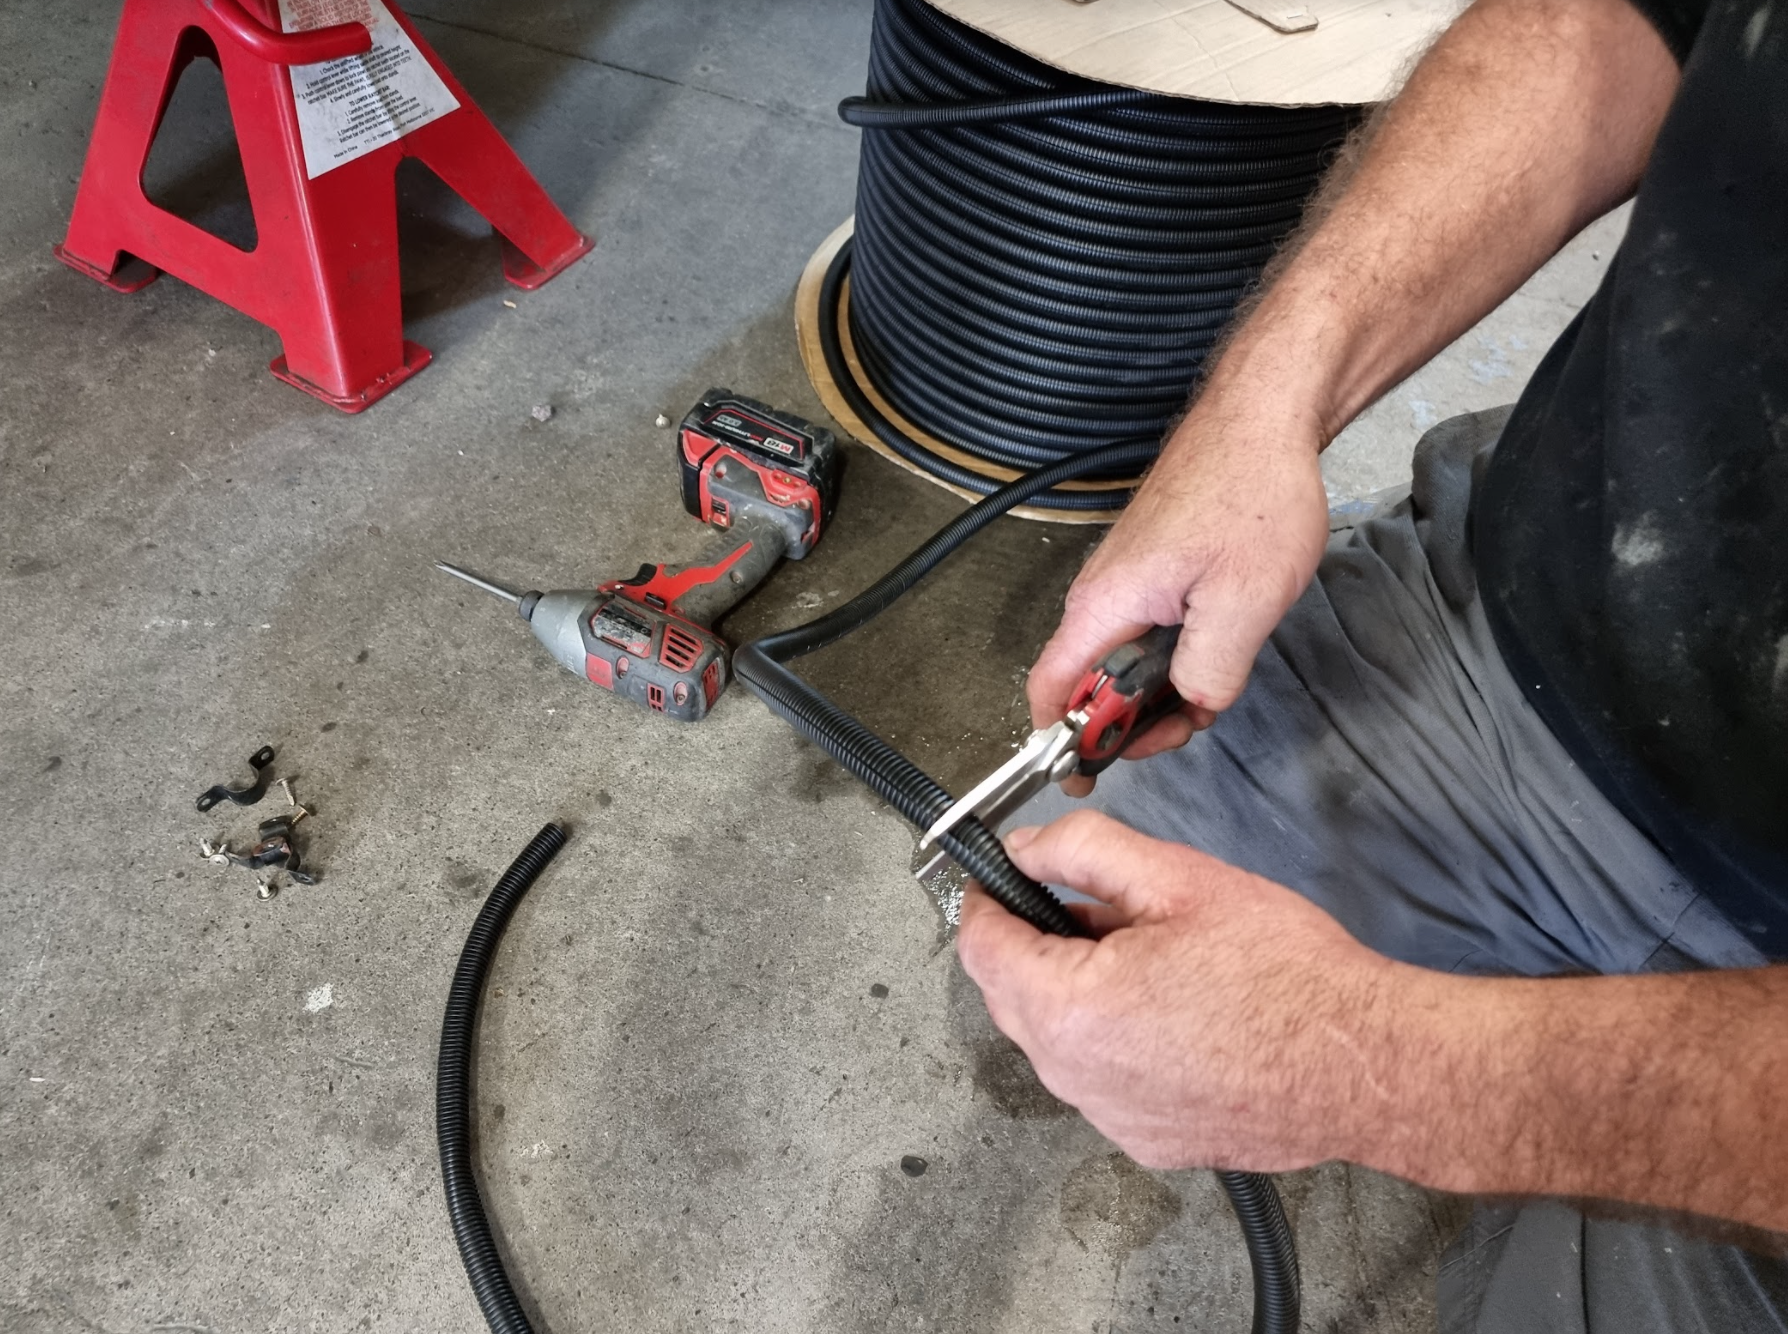 3. Cut conduit with snips 3. Cut conduit with snips |
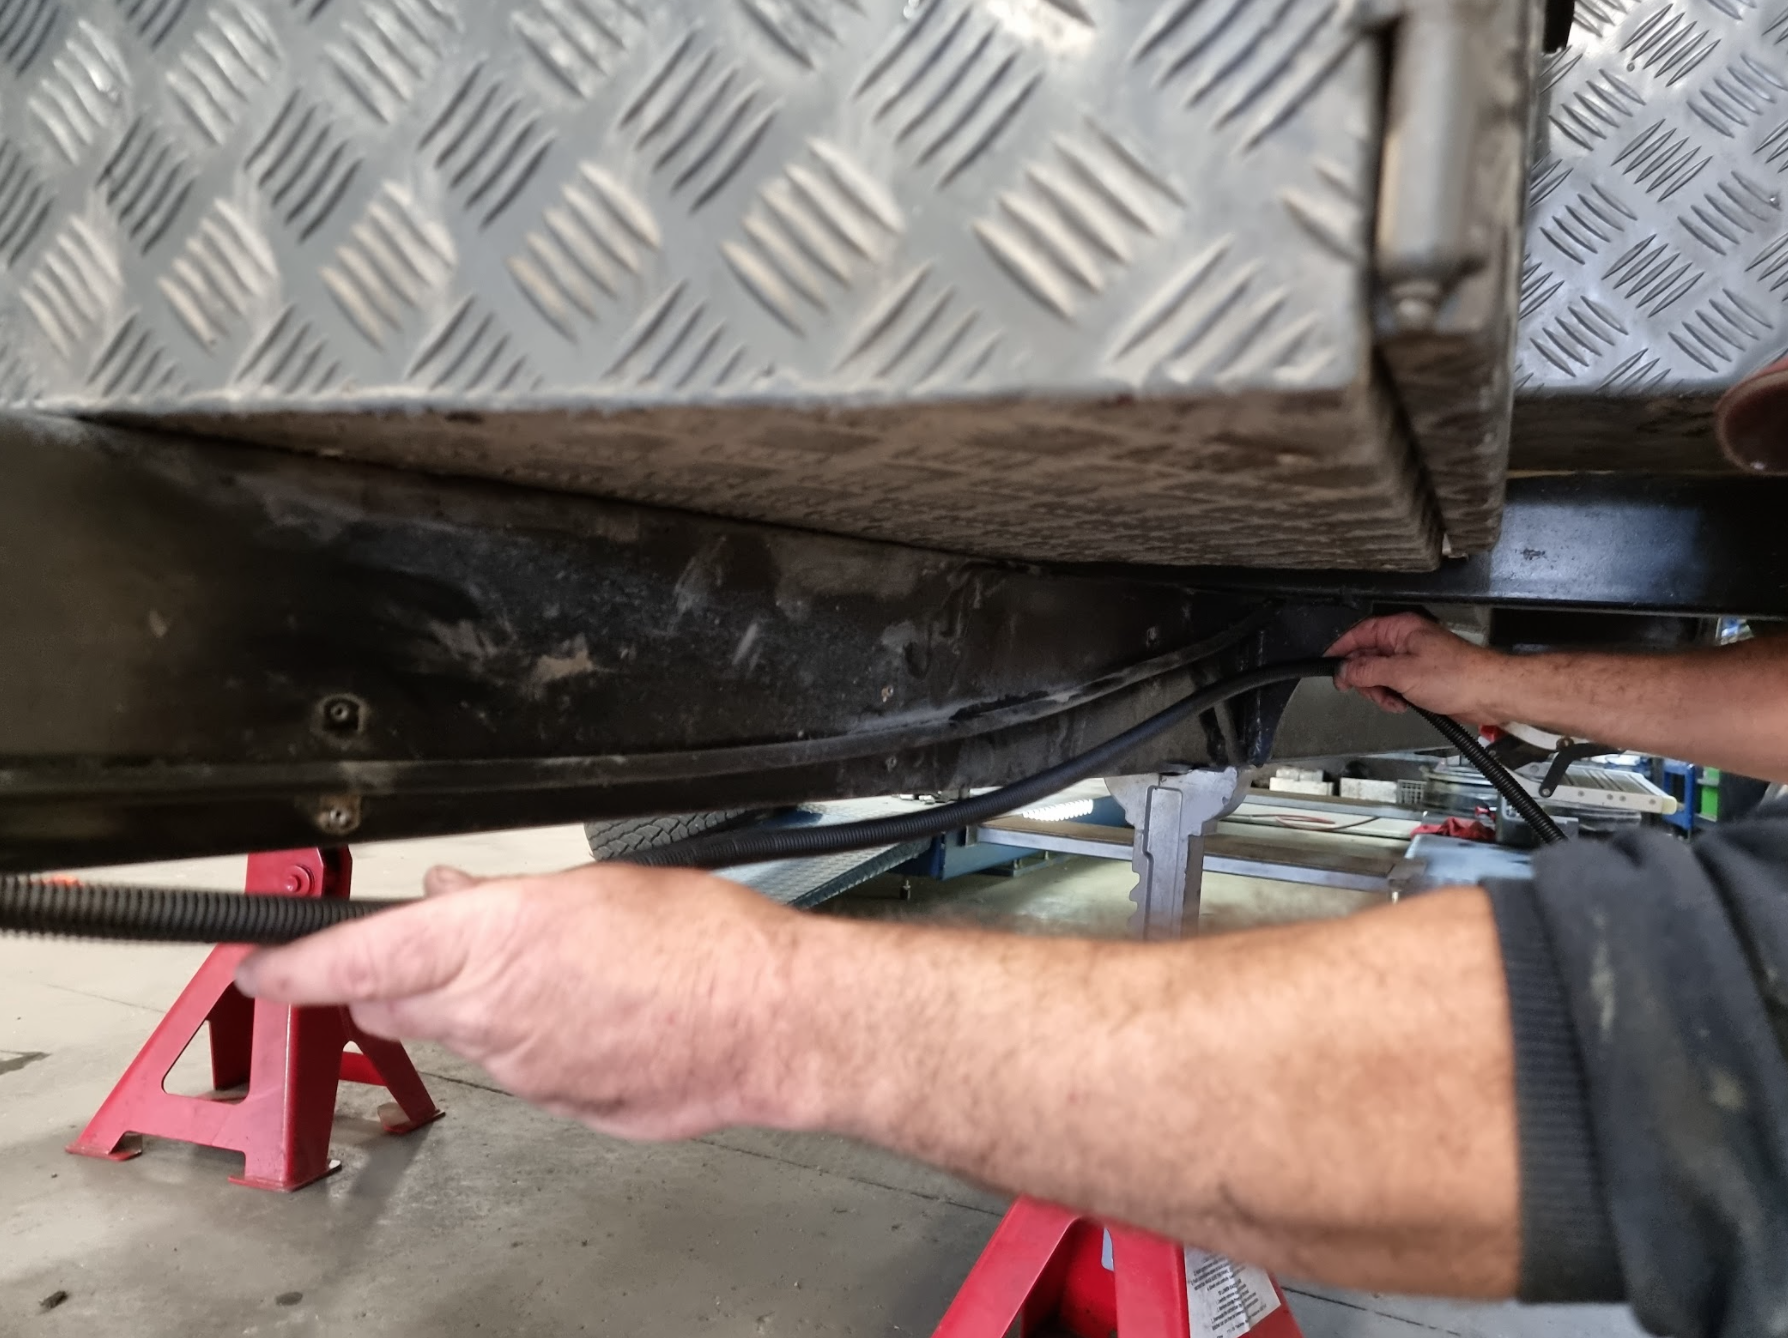
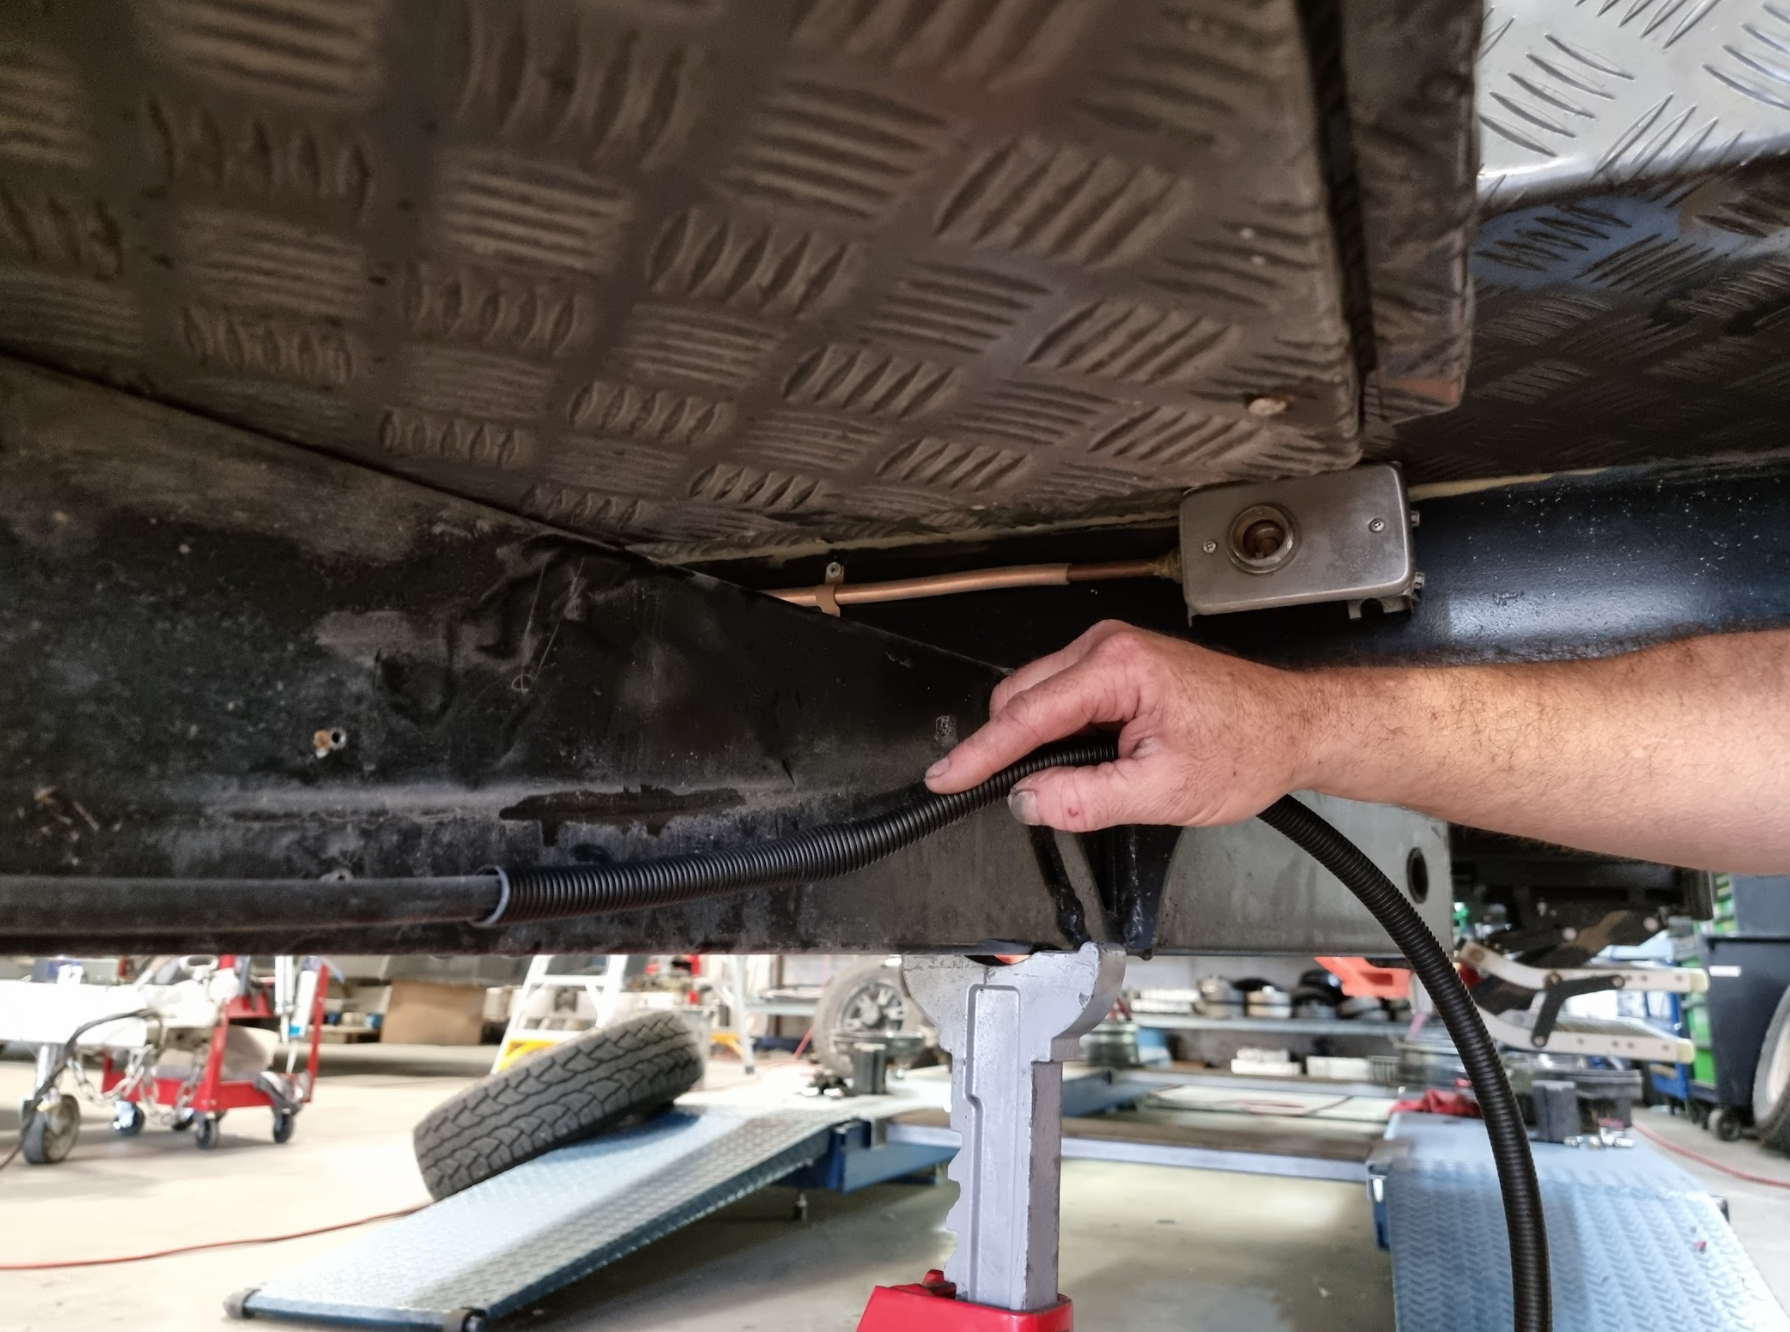 4. Use the split in the conduit to feed it onto the piece 4. Use the split in the conduit to feed it onto the piece |
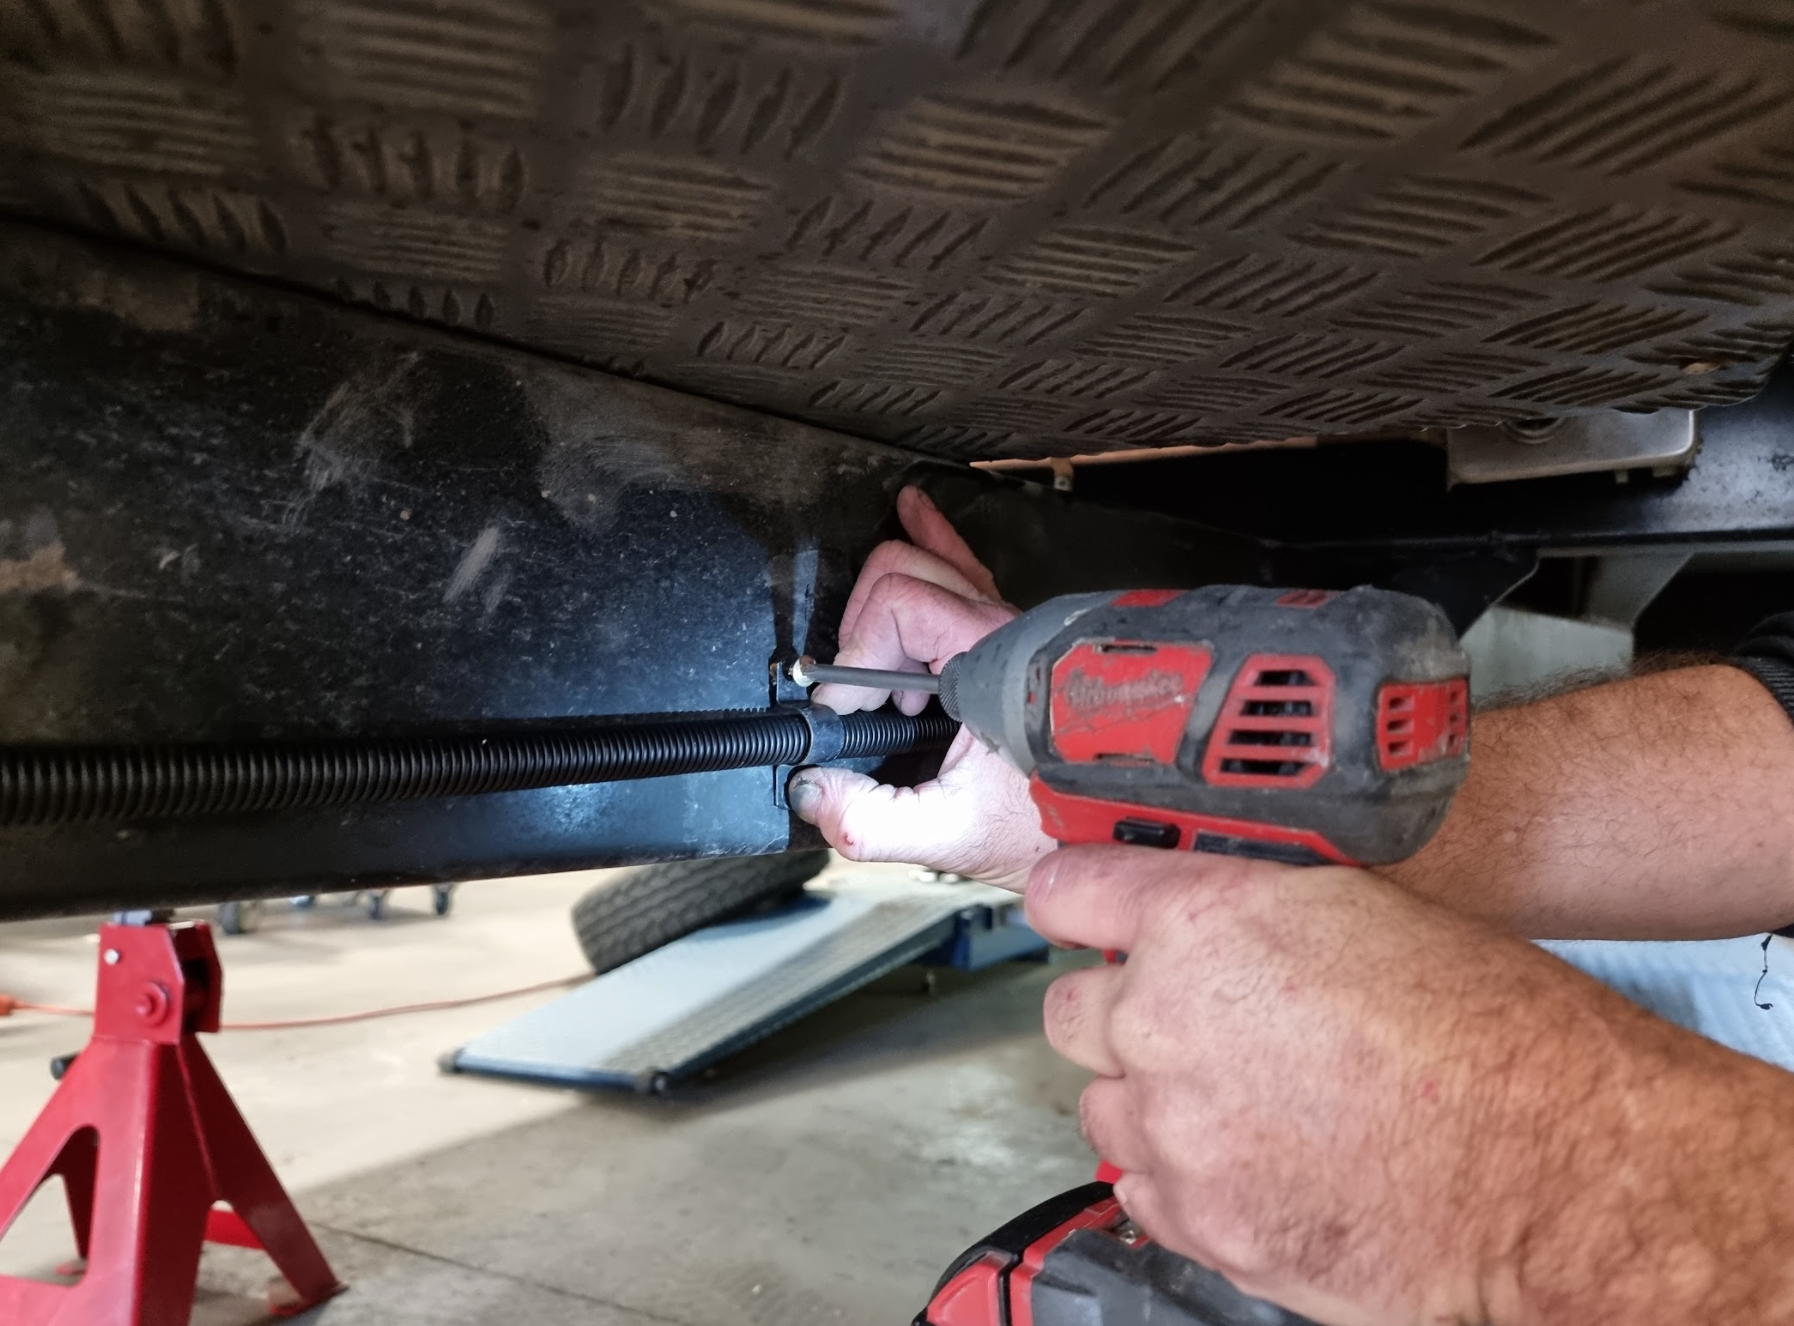 5. Reattach clamps 5. Reattach clamps |
Flexible Conduit Protecting Wiring to Brakes
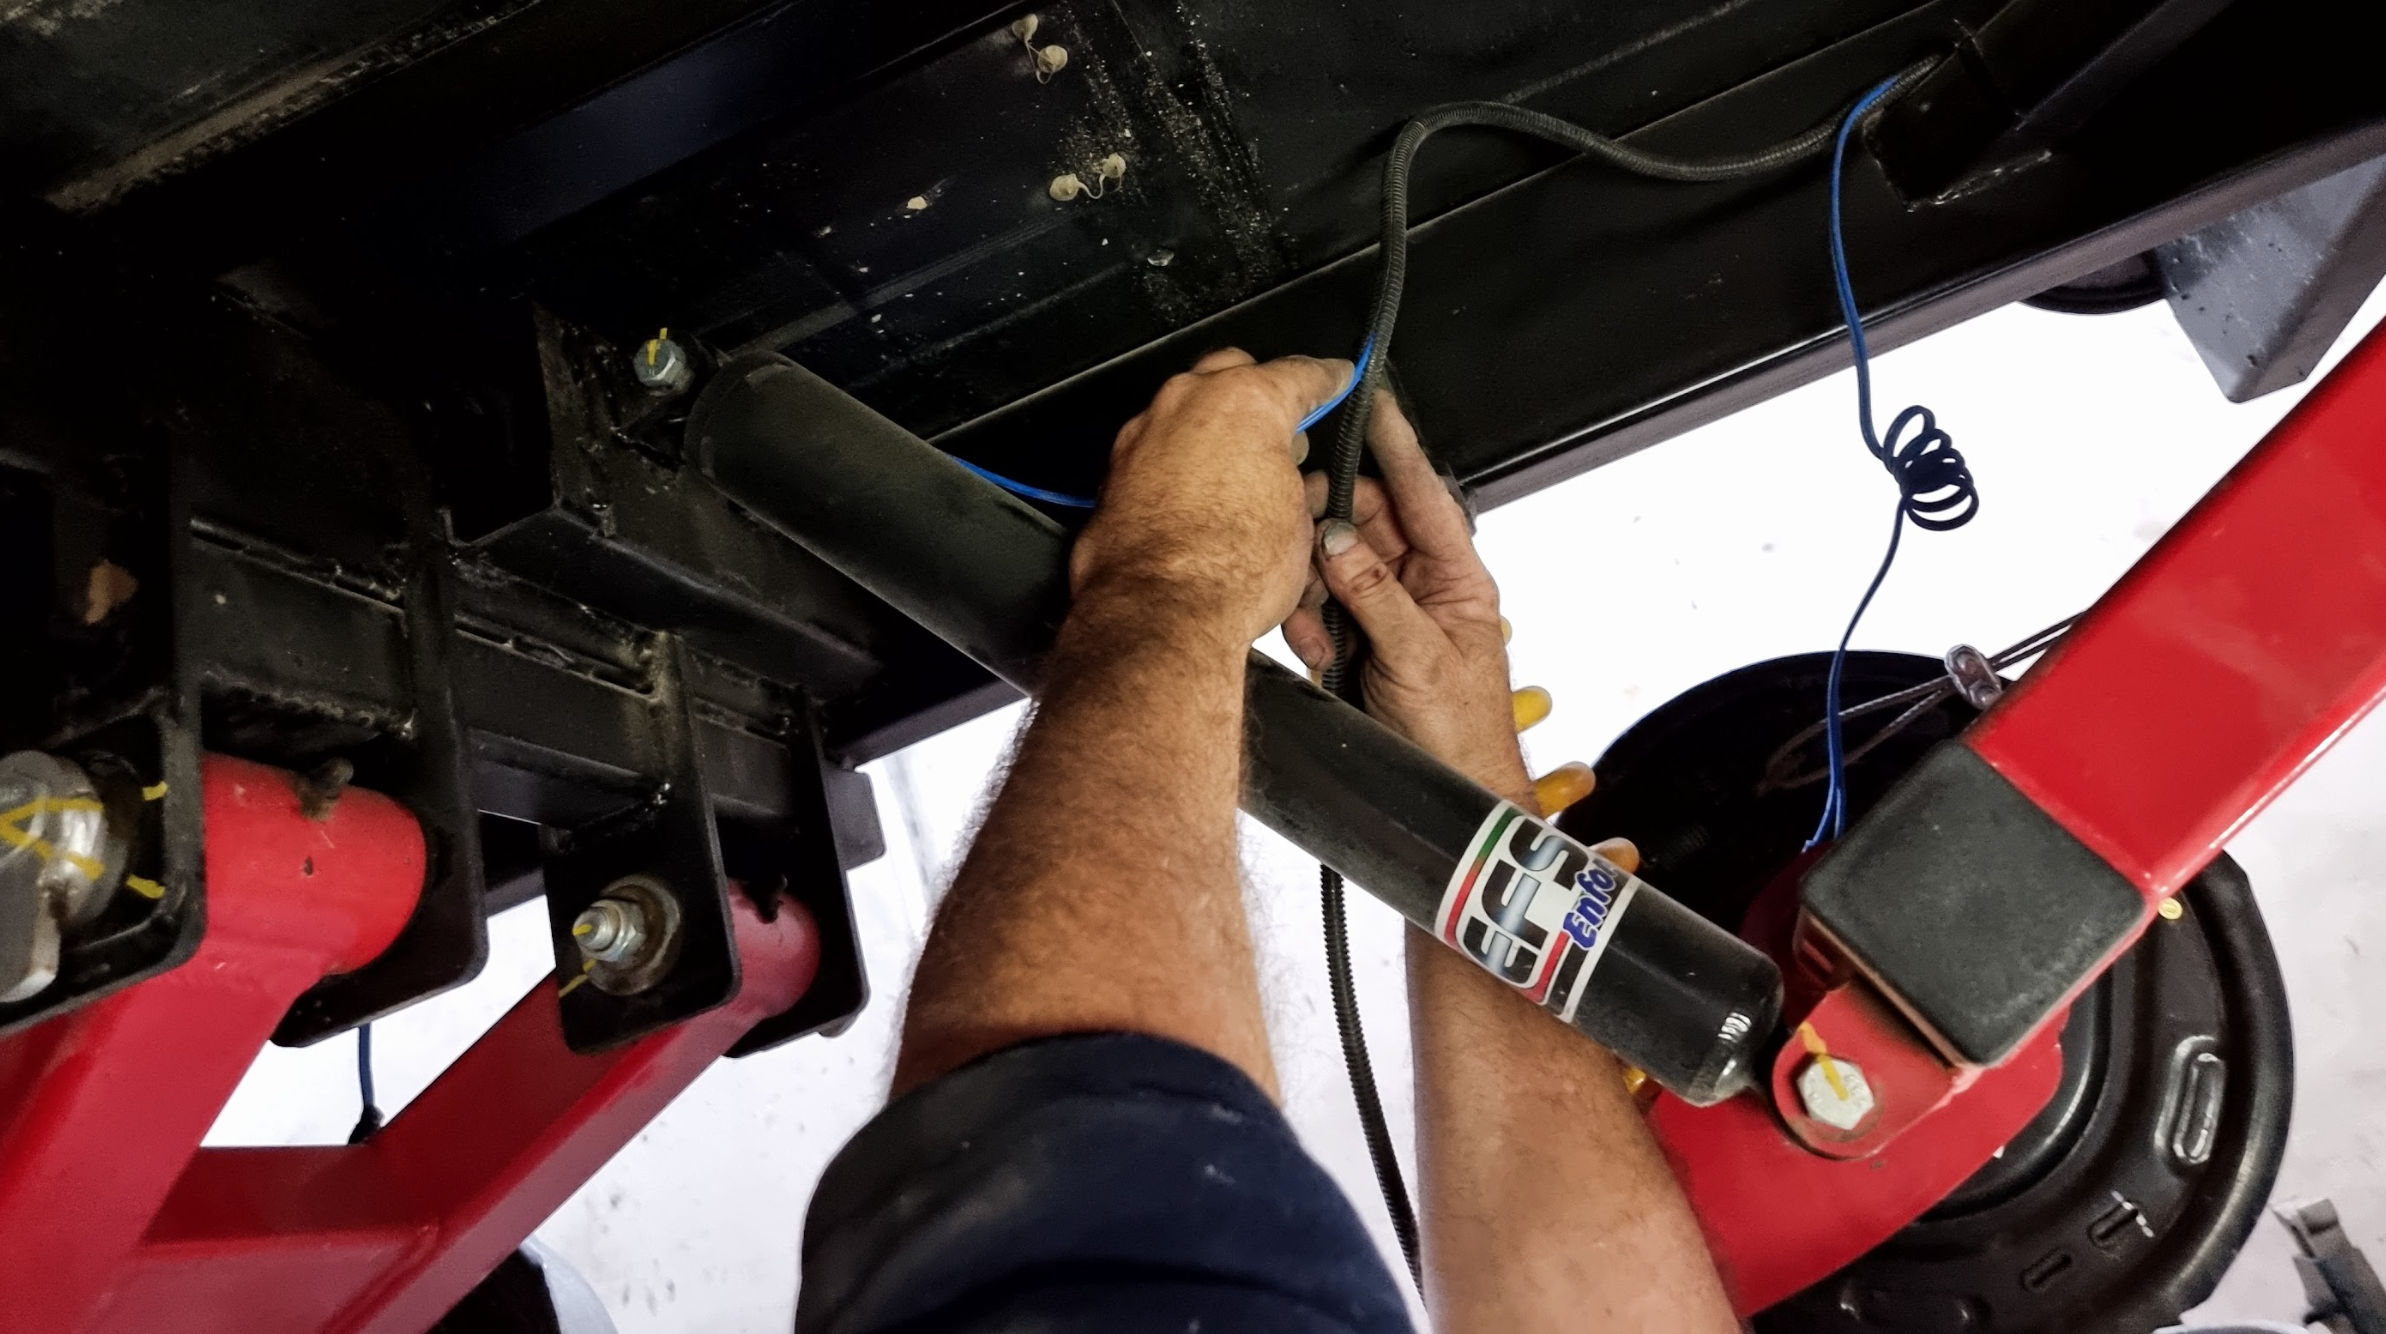 1. Protecting wiring to electric brakes is critical 1. Protecting wiring to electric brakes is critical |
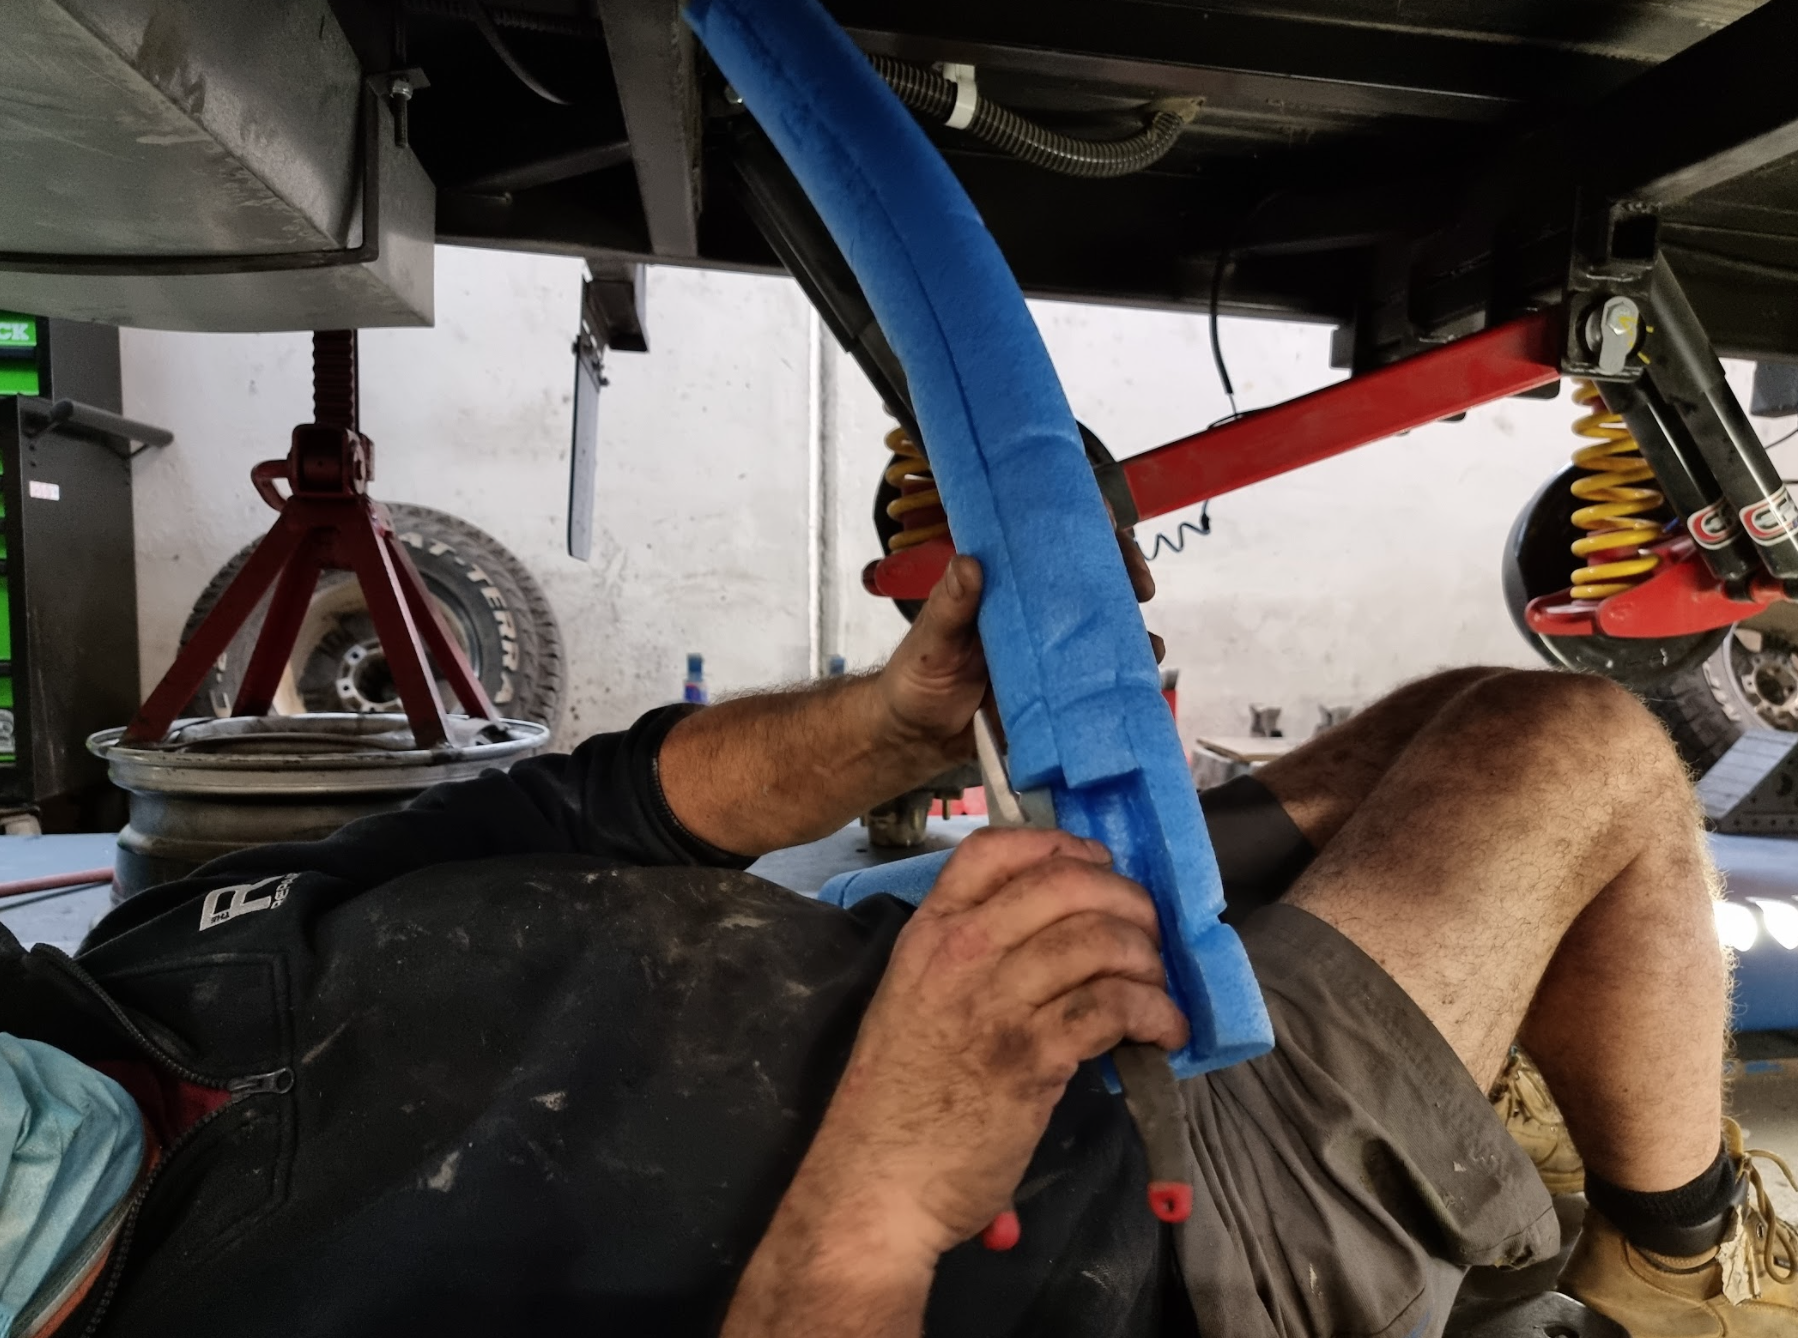
Foam Sleeve Protecting Plumbing Lines
 1. Exposed plumbing lines can be easily protected 1. Exposed plumbing lines can be easily protected |
 2. Noodles can be slipped over plumbing 2. Noodles can be slipped over plumbing |
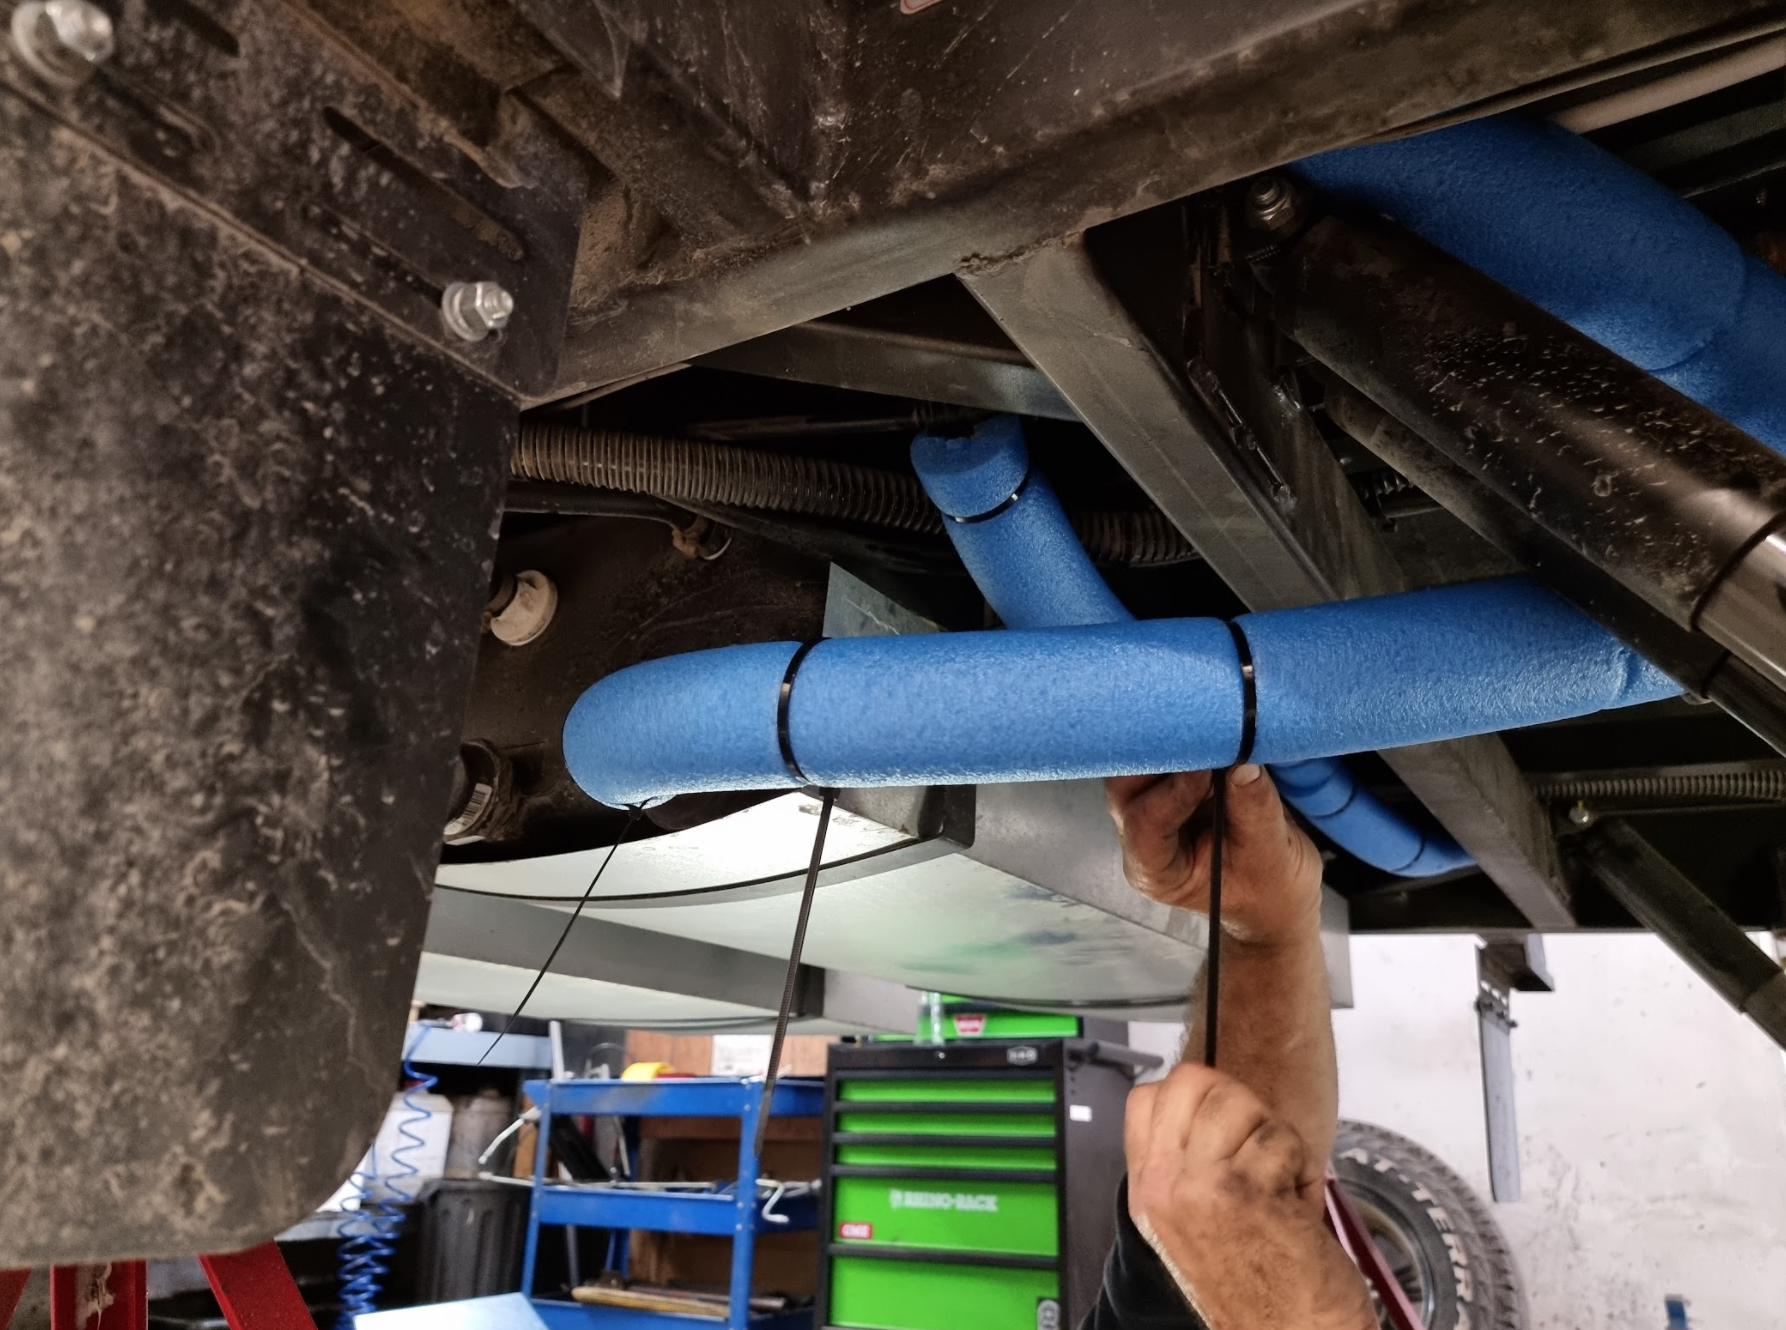 3. Secure pool noodles with cable ties 3. Secure pool noodles with cable ties |
 4. Notches can be cut to work around plumbing fittings 4. Notches can be cut to work around plumbing fittings |

Rubber Flap Protecting Water Fitting
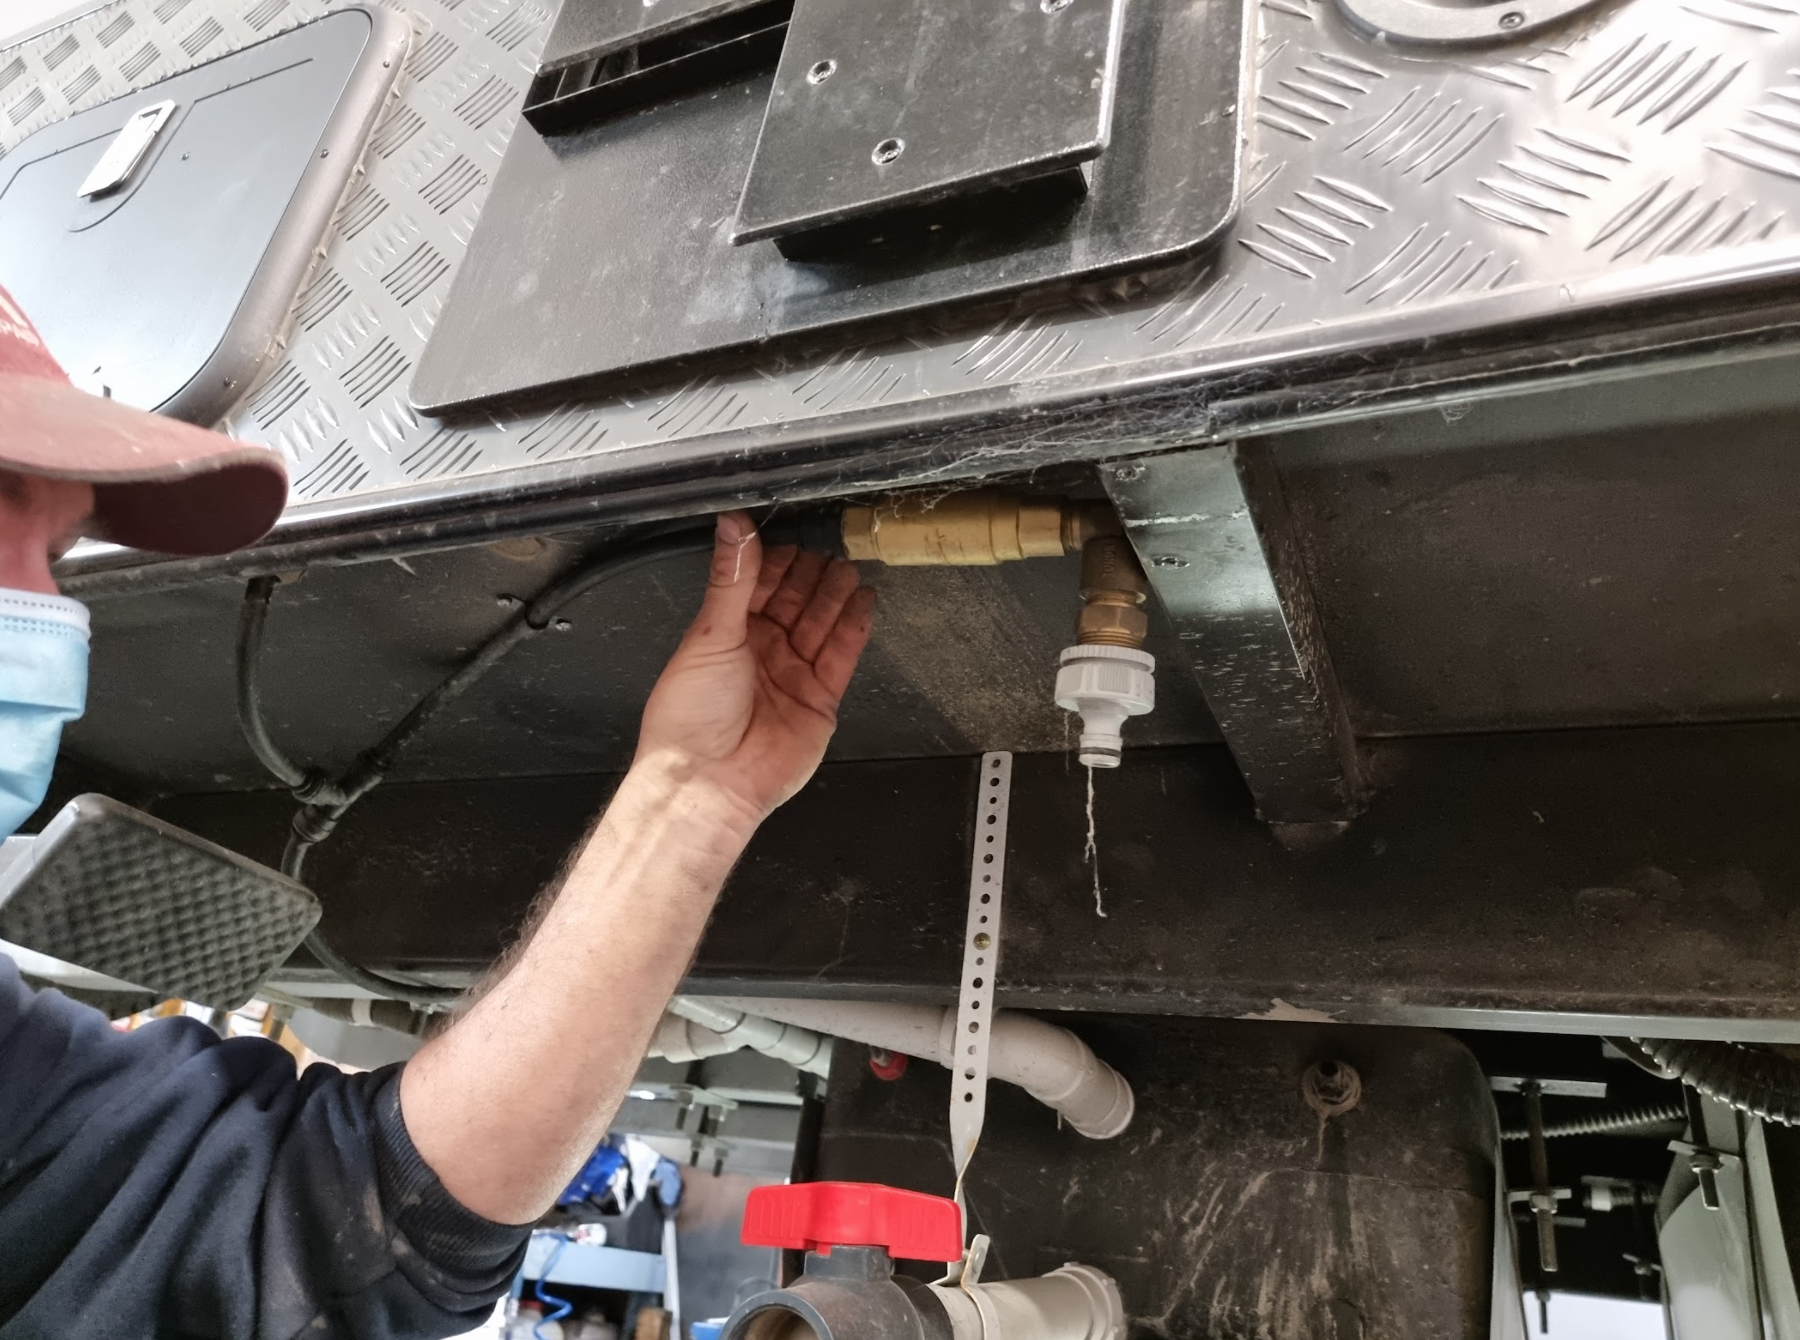 1. Plumbing fitting was relocated to behind chassis member for easy flap mounting 1. Plumbing fitting was relocated to behind chassis member for easy flap mounting |
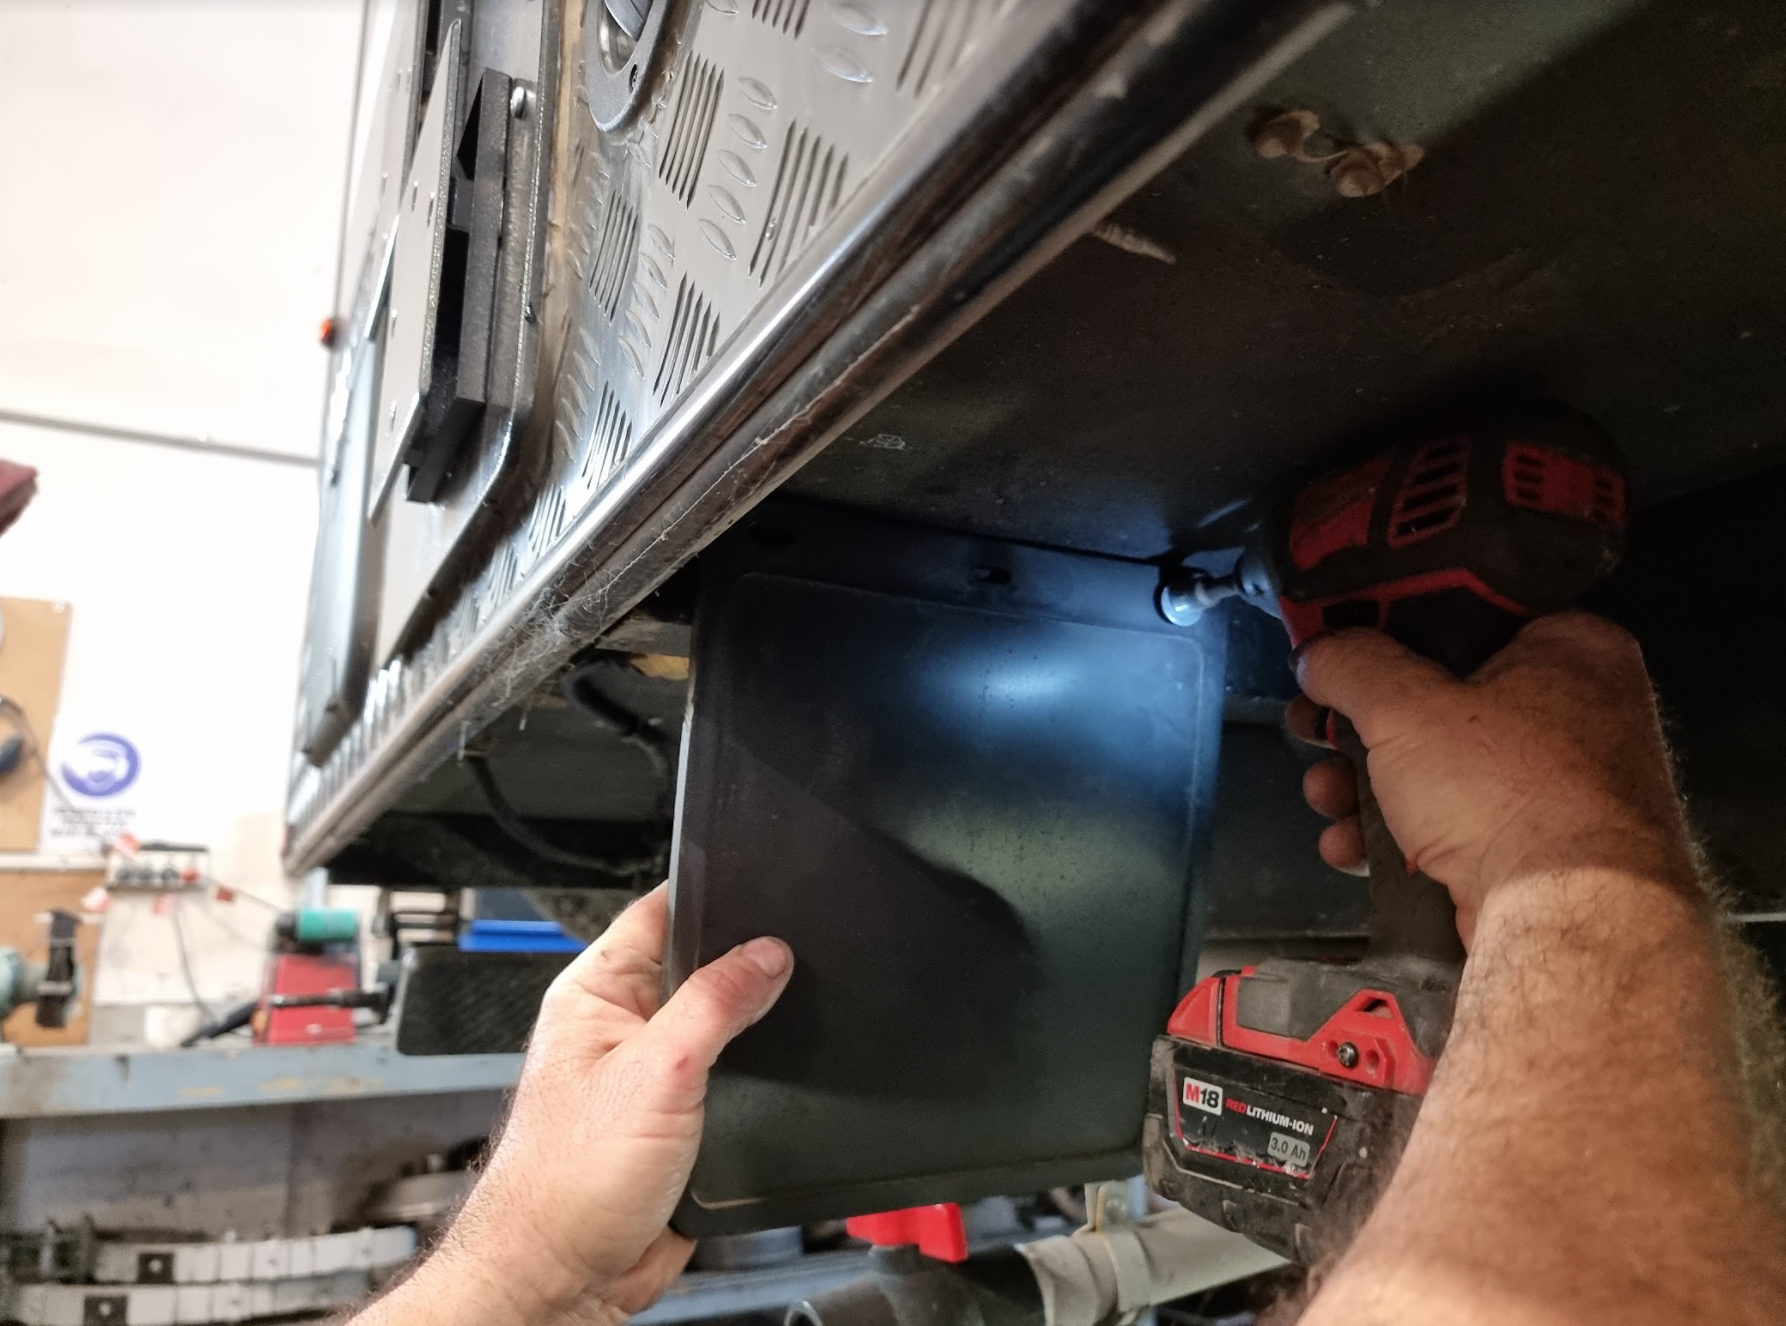 2. Rubber flap can then be screwed onto chassis 2. Rubber flap can then be screwed onto chassis |
 3. Plumbing fitting well protected by rubber flap 3. Plumbing fitting well protected by rubber flap |


0 comments