
:
Keeping Gear in Good Order
Words Sam Richards Pics Supplied
MAINTAINING YOUR GEAR
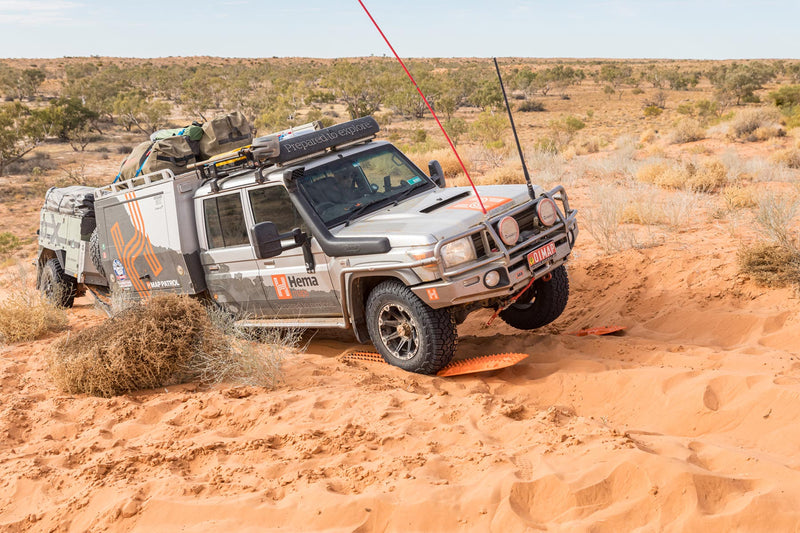
Want a hassle-free holiday and a long life for your purchases? Learn how to keep your gear in good order with fundamental pre- and post-trip maintenance jobs.

Let’s face it. Camping gear can be expensive, so it’s important to do all you can to maintain your purchases. Flat tyres, blown fuses and mouldy canvases are just a few examples from the long list of devilish pranks gear can pull on unwary consumers. Australia’s hot, dusty, and occasionally water-logged environment is its malicious accomplice in this.
Fortunately, a little bit of preparation before, during and after a trip can forestall considerably worse inconvenience down the line. In this article, we’ll skim the surface of the potentially endless topic of pre- and post- trip preparation, suggesting a few crucial ways in which you can ensure your car, tent and camper are in working order so that you can pursue your travels freely.

CHECK YOUR VEHICLE BEFORE YOU LEAVE
Ideally, your car will have had a service recently, within the last 7500km at least, and the number of kilometres you plan to travel will not push you over the recommended kilometre count for your next service. Having had a recent service ensures any outstanding issues will have been identified by a professional and nipped in the bud.
Opening the bonnet and checking fluid levels can ensure your car has what it needs or point to potential problems. Perform the classic dipstick check on engine oil, wiping away oil and re-dipping to check levels are between the two markers. Check coolant, transmission fluid, power steering fluid, brake fluid and windscreen water levels (you’ll need plenty to clear away dust and bugs). Many fluid levels can be gauged by markers on the side of transparent tanks; low levels may point to leaks or merely indicate that a refill is due. Note that oil needs to be drained before refilling and that it’s best to change the oil filter while you’re at it; consult your car’s manual to see how to achieve this if you wish to tackle it yourself.
Turn the keys in the ignition and make sure any warning lights — such as the airbag or battery light — turn off after the car has run its diagnostic tests. If they stay on, resolve the issue prior to departure. In the case of a battery, have a free test at a battery shop to gauge how long it has left and replace it if necessary. For the airbag light, check under your seats to see if you’ve accidentally unplugged any connections by jamming your thongs or jumper leads under there, and if not, consult your manual or a mechanic to resolve the issue. Your car manual should advise on the course of action whatever the warning light.

For both the vehicle and camper, check the air pressure of tyres to ensure they are at desired levels. If they are alarmingly low, take them in for puncture repair (which usually costs around $40); but do remember they will be about 4psi lower when cold (i.e., not driven on recently). Ensure your spare is in working order, that your car jack will be able to elevate the tyre off the ground (not a given if the jack has been replaced at one point), and that you have sufficient leverage to remove firm wheel nuts (such as those that have been drilled tight; I use a breaker bar with a socket to this end). Most importantly, assess tyre wear against treadwear indicators to gauge whether it is time for a new set (aim for no more than 50 per cent wear for offroad work) or for a wheel alignment (a good idea if wear is uneven on individual tyres).
In anticipation of something going wrong, curate a list of essential spares, such as fuses and lights. In Litchfield, I blew a fuse by accidentally nudging a bit of metal down my 12V cig point charger and had to make a trip to Darwin that I could’ve spared myself by having the correct 15A fuse at hand. Also check your toolbox is fully stocked, with spanners, a ratchet and socket set, Phillips and flathead screwdrivers, duct tape, electrical tape, WD-40 and so forth. Air and cabin filters are other items the average DIYer can easily check and either clean or replace if necessary.
CHECK YOUR CAMPER AND TENT
Plug your trailer up to your car’s seven-pin or other plug and run through the standard but unavoidable check of hazards, headlights, indicators, and brake lights, with the help of a mate. On the topic of power, use your in-built voltmeter or apply one to the camper’s battery to gauge its state of charge. AGM batteries shouldn’t be allowed to linger below 50 per cent charge, as this shortens their life. If the volt reading indicates a low charge like this and the battery is struggling to reach full capacity after you’ve attempted charging, consider forking out for a new battery. If you don’t, the risk is that the battery will cark it during the trip and your fridge/freezer will lose power. Farewell to those T-bone steaks…
On a more mechanical note, it’s worth servicing the wheel bearings before heading off on any sizable trip. To assess if this is necessary, jack up a tyre and ideally support the axle with a stand. Hold the tyre and shake it back to front and side to side to see if there is play in either direction or whether there’s a knocking noise. Either symptom may mean it is time to repack the bearings with grease or to retighten components — or worst case, to replace bearings completely. Even if everything is in tip-top shape, it’s still wise to service bearings pre-emptively.

Remove the dust cover, the split pin, and the castle nut, before carefully removing the hub, with the bearings inside, from the spindle. Proceed to remove the outer and inner bearings, using a hammer and punch if necessary. Examine them for wear and tear, corrosion, or bluing from intense heat; you’ll be able to do a more thorough job if you clean them in a solvent first. Hold the inner runner still and spin the outer to ensure it is spinning freely.
Repack the existing bearings or new bearings with bearing-specific high-temperature grease by wearing gloves and forcing grease between the inner and outer runners with your palm until it emerges on the narrower end. Examine the spindle for scoring or other damage while the hub is off; consider cleaning it with kerosene or a solvent to get a better view, before subsequently applying new grease.
Finally, reinstall the components in the reverse order, making sure to use a new seal and a new split pin to lock the castle nut in. To ensure correct tension on the castle nut, tighten it up fully and then back it off a touch before inserting the pin. During your holiday itself, every two or so


0 comments